Welcome to the “DIY Outdoor Wood Furnace Guide,” your comprehensive resource for building a cost-effective and efficient outdoor wood furnace system. Throughout this guide, we provide you with step-by-step instructions, expert tips, and essential information so that you can make your own outdoor wood furnace, which saves energy and the environment at the same time.
The “Outdoor Wood Furnace Guide” empowers individuals and homeowners to take control of their heating needs while reducing their carbon footprint. The steps in this guide will guide you through the process of building a dependable outdoor wood furnace, whether you are looking to supplement your existing heating system or want an eco-friendly alternative.
What Is DIY Outdoor Wood Furnace and what is its operation?
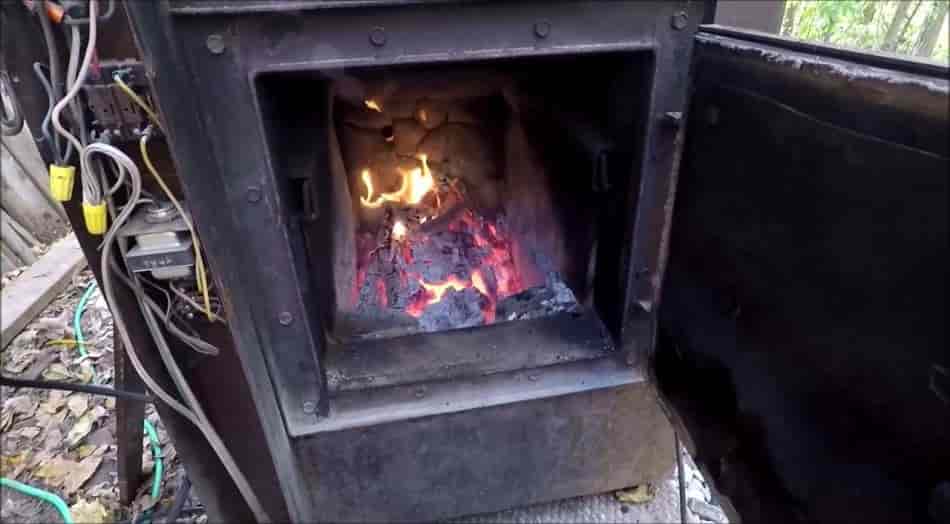
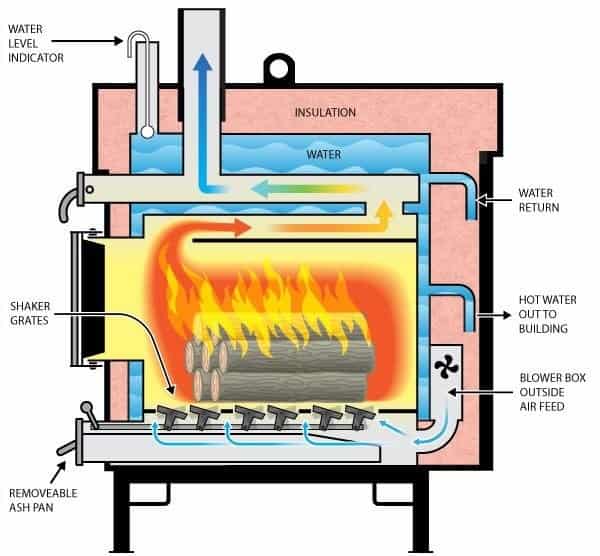
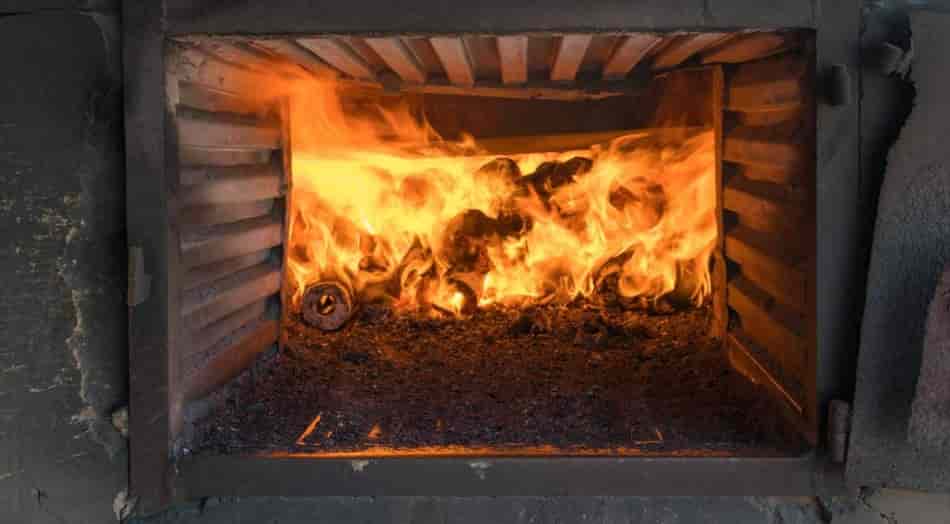
An outdoor wood furnace operates by burning wood, typically logs or split wood, to generate heat for heating buildings or multiple structures. The wood is loaded into the furnace, ignited, and undergoes combustion, producing high temperatures. A heat exchanger within the furnace transfers the heat from the burning wood to a fluid, often water or a water-antifreeze mixture, circulating through pipes or tubing.
This heated fluid is then pumped through underground pipes or a heat exchanger within the building’s heating system, where it releases its heat, warming the indoor space through radiant floor heating, baseboard heaters, or forced-air systems. The cooled fluid returns to the outdoor furnace for reheating, maintaining a comfortable indoor temperature regulated by a thermostat or controller.
Outdoor wood furnaces offer the advantage of using a renewable fuel source and keeping the mess and potential hazards of burning wood outside the living space, making them an efficient and environmentally friendly heating option.
Major Parts of DIY Outdoor Wood Furnace
The major parts of an outdoor wood furnace include the combustion chamber where wood is burned, a heat exchanger for transferring heat to a fluid, pipes or tubing for fluid circulation, and a distribution system within the building for heating. A thermostat or controller regulates temperature, and there’s often an ash disposal system.
Benefits of Using Outdoor Wood Furnace
The benefits of using this type of outdoor furnace include:
- Cost Savings: It utilizes wood, a renewable and often low-cost fuel source, reducing heating expenses.
- Environmental Friendliness: Wood is a sustainable fuel, and outdoor furnaces are efficient, reducing carbon emissions.
- Safety: By keeping the fire outside, it minimizes indoor fire hazards and potential health risks associated with indoor wood burning.
- Efficiency: Heat transfer systems are designed for optimal efficiency, ensuring effective heating.
- Flexibility: Can be integrated with various heating systems, providing versatility in home heating options.
- Independence: Decreases reliance on traditional energy sources, offering more control over heating needs.
- Longevity: Well-maintained outdoor furnaces can have a long operational life, offering durable heating solutions.
Determining the Suitable Installation Location for an Outdoor Wood Furnace
When considering where to install an outdoor wood furnace, several key factors should be taken into account to ensure its efficient operation and safety. Firstly, it is crucial to position the furnace within a reasonable distance of the buildings it will heat to minimize heat loss through long pipe runs.
The installation site should also have adequate clearance from combustible materials, such as trees, sheds, or other structures. Proper ventilation and clear access for fuel loading are essential, so the furnace should be placed on a stable, level surface.
Additionally, check local regulations and obtain any necessary permits to ensure compliance with safety and environmental standards. Overall, thoughtful planning and adherence to safety guidelines are vital when determining the placement of your outdoor wood furnace.
Crucial Considerations before Building an Outdoor Wood Furnace
Before embarking on the journey of building your outdoor wood furnace, there are several essential factors to keep in mind to ensure a successful and safe project:
- Local Regulations: Check with your local authorities for any zoning restrictions, environmental regulations, or permits required for installing and operating an outdoor furnace. Compliance with these rules is vital.
- Fuel Source: Assess the availability and sustainability of wood as your fuel source. Ensure a steady supply of quality firewood or wood pellets to keep your furnace running efficiently.
- Location: Determine a suitable location for your outdoor furnace, considering proximity to the buildings you intend to heat, safety clearance from combustible materials, and proper ventilation.
- Heat Distribution: Plan how the heat will be distributed within your home or buildings. Radiant floor heating, baseboard heaters, or a forced-air system may be options, so choose the one that best suits your needs.
- Insulation: Adequate insulation in your buildings is essential for efficient heat retention. Ensure that your structures are well-insulated to maximize the benefits of your outdoor furnace.
- Fuel Handling and Storage: Create a designated area for storing firewood or pellets, keeping them dry and protected from the elements.
- Safety Precautions: Implement safety measures like fire extinguishers, smoke detectors, and proper venting to prevent accidents and ensure indoor air quality.
- Maintenance: Understand the maintenance requirements of your furnace, such as regular cleaning of the combustion chamber and heat exchanger, to keep it running efficiently and prolong its lifespan.
- Cost Analysis: Calculate the upfront and ongoing costs of building and operating your outdoor furnace to ensure it aligns with your budget.
- Environmental Impact: Consider the environmental impact of wood burning, and explore ways to minimize emissions and maximize efficiency.
- Professional Advice: If you are not experienced in furnace construction, consult with experts or hire a professional to help with the installation to ensure it’s done safely and effectively.
Skills Required for DIY Outdoor Wood Furnace Installation
The Skills required for outdoor wood furnace installation are:
- Mechanical Skills: Proficiency in basic plumbing and mechanical systems is crucial for connecting pipes, pumps, and heat exchangers effectively.
- Electrical Knowledge: Familiarity with electrical systems is essential for wiring thermostats, pumps, and control panels to ensure safe and efficient operation.
- Construction Skills: Competence in construction and carpentry is valuable for building a secure platform or shelter for the furnace, ensuring it’s level and well-ventilated.
- Safety Awareness: Understanding safety protocols and procedures is paramount, as outdoor furnace installation involves working with high temperatures and potentially hazardous materials.
- Regulatory Understanding: Knowledge of local building codes and environmental regulations is necessary to ensure compliance during installation.
- Problem-Solving Skills: The ability to troubleshoot and solve unexpected issues that may arise during installation is vital for a successful project.
- Planning and Design: Skills in planning and design are important to determine the optimal location, heat distribution system, and fuel storage solutions for your specific needs.
- Communication: Effective communication is key when coordinating with suppliers, authorities for permits, and potential assistance from professionals.
Can a Non Professional Install DIY Outdoor Wood Furnace?
Yes, a non-professional can install an outdoor wood furnace, but it’s important to recognize that it’s a complex project that requires a certain level of skill and knowledge in areas like plumbing, electrical work, construction, and safety protocols.
- DIY Experience: If you have experience with DIY projects, are comfortable with tools, and have tackled similar home improvement tasks, you may have the skills needed to install an outdoor wood furnace.
- Education and Research: Invest time in thoroughly researching outdoor furnace installation, understanding the specific requirements and regulations in your area, and seeking guidance from reputable sources.
- Consultation: Consider consulting with professionals or experts in HVAC systems or outdoor furnace installations. They can provide valuable advice, guidance, and even on-site assistance if necessary.
- Permits and Codes: Ensure you obtain any necessary permits and adhere to local building codes and regulations. Ignoring these requirements can lead to legal issues and safety hazards.
- Putting safety first: Safety should always be a priority. High temperatures and potentially hazardous components are associated with outdoor wood furnace installations. Make sure you take safety precautions.
- Maintenance Awareness: Understand the maintenance requirements of your furnace and commit to regular cleaning and upkeep to ensure safe and efficient operation.
- Cost vs. Benefit: Weigh the cost of professional installation against your own capabilities. Sometimes, the peace of mind and the assurance of a job well done by professionals are worth the investment.
Installing an Outdoor Wood Furnace: DIY vs. Factory-Made
Installing an outdoor wood furnace can be an excellent way to efficiently heat your home. Whether you choose to build a DIY furnace or opt for a factory-made one, this guide will walk you through the installation process. We will outline the steps involved in both approaches, highlighting the key components and materials needed for each.
Wood Furnace Type 1: DIY
Step 1: Required Tools and Materials
| Component | Quantity/Description |
| ½-inch steel sheet roll | As needed |
| Sheet metal cutter | 1 |
| Stainless steel hinges | 2 (for door) |
| MIG/TIG welding machine | 1 |
| Ducting (8 inches) | 8-inch diameter ducting |
| Accessories for ducting (collars, clamps, etc.) | As needed |
| 8-inch duct fan | 1 |
Step 2: Building the DIY Furnace
Step 2.1: Cut the Boxes
- The Outer Box
- The bottom should be made of three pieces of ½-inch steel.
- Extend sides and back by 1-2 inches for seam welding.
The Inner Box (Firebox)
- Maintain 8-12 inches of space between the outer and inner boxes.
- Recommended dimensions: 20-24 inches in length and width, or diameter if round.
Step 2.2: Make the Door
- Cut door hole based on firebox shape.
- Add ½-inch steel sheet with 1-inch extension around the hole.
- Install hinges on the door.
Step 2.3: Create Holes on the Tops
- Two 8-inch holes on the outer box and one 8-inch hole on the inner box.
- Ensure alignment between the inner and outer box holes.
Step 2.4: Add Legs on the Bottom
- Weld 4 metal legs to each corner of the bottom.
Step 2.5: Weld Up The Seams
- Use MIG or TIG welding to ensure secure seams.
Step 2.6: Ductworks should be installed
- The inner box should have a hole through which an 8-inch duct can be connected to the outer box.
- A second 8-inch duct should be added to the outer box’s second hole.
- Make another 8-inch hole in the outer box and add another 8-inch duct.
Step 2.7: Build the Wood Rack
- Construct a 2-inch tall rack a bit shorter than the width of the firebox.
- A 2-inch gap should be maintained between the rack and firebox in order to collect ashes.
Furnace Type 2: Ready-Made Outdoor Wood Furnace
Step 1: Materials and Tools Required
| Component | Description |
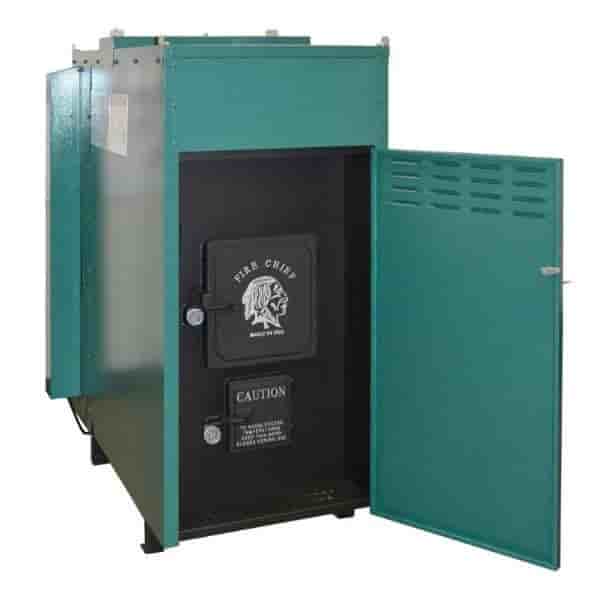
| Outdoor wood furnace (e.g., FIRE CHIEF FC1900) | 1 |
| Starter collars for warm and cold air | Included with furnace |
| Thermostat | Included with furnace |
| Spare fuse link | Included with furnace |
| Backup generator (2000W minimum) | 1 |
| 6-8″ Class A chimney pipe | As needed, based on installation distance |
| Guy wire bracket | Included with furnace |
| Stainless steel wire | Included with furnace |
| PVC Pipe | As needed, based on installation |
Step 2: Installation Process
Step 2.1: Calculate the right distance and base
- Place the furnace on a non-combustible base (preferably concrete).
- Keep the furnace close to the house for efficiency.
- Use a 6-8″ Class A chimney pipe if installation is further from the house.
- Connect the furnace to an electric circuit for the backup generator.
Step 2.2: Install the Chimney
- Use the anchor plate provided with the furnace.
- Apply silicone to make a leak-proof joint.
- Attach the chimney pipe to the anchor plate using stainless steel wire and guy wire bracket.
- Consider using a Roof Guy Kit for protection against wind and snow.
Step 2.3: Dig a Trench for Power Lines & Ducting
- Dig a trench below the frost line for power lines and ducting.
- Use a towable backhoe for longer distances.
- Install underground-rated power cables.
Step 2.4: Make sure you check the local regulations
- Ensure compliance with local installation codes.
- Consult a local building inspector if unsure.
Step 2.5: The furnace needs to be powered up
- Ground your 110V power outlet and connect the grounded power wires.
- Follow the Electrical Control Kit guidelines for connections.
Step 2.6: Firstly Light the Fire
- Burn a small amount of wood before connecting the duct to the home.
- Do not load the wood burner to capacity on the first fire.
- Allow the initial smoke and odors to burn off.
Step 2.7: Make sure the ducting is connected
- Direct duct openings to where they will connect to the furnace.
- Measure and install galvanized ducting.
- Insulate ducts with duct tape and mylar roll.
- Make sure the duct enters the house through a sealed window.
- Connect starter collars to heat supply and cold air return vents.
Step 2.8: Final Checks
- Check for leaks, cracks, or mistakes.
- Make sure the air registers are open, that the furnace is fueled, and that it is turned on.
The construction of the wood store or shed
Step 1: Materials and tools must be collected
- Materials: Treated pine wood in various sizes, OSB plywood, screws, liquid roofing, deck bolts.
- Tools: Ladder, saw, level, measuring tape, triangle square, drill machine, brush, protective gear.
Step 2: Prepare the wood for staining and cutting
- Cut the wood as per the provided sizes or customize as needed.
- Apply an oil-based or natural stain to protect the wood.
Step 3: Side panels should be built
- Connect cross supports to posts through pilot holes.
- Install slats as side supports.
Step 4: Build the walls and base by setting the footings
- Use piers for corner footings.
- Beams, posts, and joists should be added
Step 5: Add the Beams, Posts, and Joists
- Strengthen the structure with joists, posts, and beams.
- Fasten them with deck screws, nails, and joist hangers.
Step 6: Install the Roof
- Use plywood for the roof.
- Add rafters and diagonal braces for extra support.
- Strengthen the structure with screws and rubber gaskets.
Installation Notes and Tips for DIY Outdoor Wood Furnaces
- Safety First: Ensure you have proper safety equipment, including welding gear, gloves, and eye protection. Always follow safety guidelines when working with welding equipment.
- Fire Safety: Keep the DIY outdoor furnace at a safe distance from any flammable materials, structures, or overhanging trees.
- Airflow: Proper airflow is crucial for combustion efficiency. Monitor and clean the air intake and exhaust regularly to prevent blockages.
- Maintenance: Regularly inspect the welds and seams for cracks or damage. Clean out ash and debris from the firebox to maintain optimal efficiency.
- Insulation: Consider insulating the exterior of your DIY furnace to retain heat and improve efficiency. This can also make it more weather-resistant.
- Weather Protection: If your DIY furnace is exposed to the elements, consider building a protective structure or using a weatherproof cover to prolong its lifespan.
- Firewood Storage: Ensure your firewood storage area is well-ventilated to prevent mold and pests. Elevating the woodpile slightly off the ground can help keep it dry.
Is Investing in an Outdoor Wood Furnace Worth the Cost?
Investing in an outdoor wood furnace can be worth the cost for those seeking efficient, renewable heating options, especially if they have access to a readily available supply of firewood . However, the worthiness of the investment depends on individual circumstances, including heating needs, local climate, and the availability of wood resources.
Cost comparison table between a DIY outdoor wood furnace and a ready-made outdoor wood furnace
Here’s a quick pricing comparison of a DIY outdoor wood stove versus a ready-made outdoor wood furnace:
| Component | DIY Outdoor Wood Furnace | Ready-Made Outdoor Wood Furnace |
| Materials and Tools | Varies based on choice of materials and tools | Furnace cost plus installation |
| Furnace Unit | Cost of steel, welding equipment, and other materials ($500 – $1,500) | Includes the furnace unit and necessary accessories ($3,000 – $5,000) |
| Installation | May require hiring a welder or skilled labor | Typically installed by professionals |
| Total Cost | Variable, but generally lower upfront cost. $1,000 – $4,000 (Approximately) | Higher upfront cost due to purchase and installation. $6,000 – $10,000 (Approximately) |
| Long-Term Maintenance | May require occasional welding and maintenance | Generally easier maintenance, possibly covered under warranty |
| Efficiency and Performance | Variable, depending on DIY skills and design | Often designed for optimal efficiency |
| Warranty and Support | DIY projects may not have warranties or support | Often comes with warranties and professional support |
The specific costs can vary widely based on individual choices and circumstances, but generally, DIY outdoor wood furnaces may have a lower initial cost compared to ready-made options. However, they may require more hands-on work and ongoing maintenance, whereas ready-made furnaces come with warranties and professional installation support, potentially justifying the higher upfront investment.
People Also Ask: FAQs
What is a DIY outdoor wood furnace, and why would I consider building one?
A DIY outdoor wood furnace is a self-built heating system that uses wood, like logs or split wood, to heat buildings. Consider building one to save on heating costs, reduce your carbon footprint with renewable fuel, and gain control over your heating needs.
What materials and skills do I need to build my own outdoor wood furnace?
To build your DIY outdoor wood furnace, you will need materials like steel sheets, welding equipment, ducting, and skills in welding, basic plumbing, electrical work, construction, safety protocols, and knowledge of local regulations.
Are there any safety considerations when building and operating a DIY outdoor wood furnace?
Safety is crucial when building and operating a DIY outdoor wood furnace. Use proper safety gear, maintain a safe distance from flammables, ensure good airflow, and conduct regular inspections and maintenance to prevent hazards.
How does the efficiency of a DIY outdoor wood furnace compare to a professionally manufactured one?
The efficiency of a DIY outdoor wood furnace can vary depending on your skills and design. Professionally manufactured units are often designed for optimal efficiency. While DIY furnaces can be efficient if well-constructed, factory-made options may offer more consistent performance and efficiency due to their engineering and design.
Can I save money by building my outdoor wood furnace, and what is the long-term cost-benefit analysis?
Building your outdoor wood furnace can lead to initial cost savings compared to buying one. However, consider long-term costs like maintenance, fuel, and repairs. Ready-made furnaces offer warranties and professional support, potentially justifying their higher upfront cost. Weigh these factors for cost-effectiveness.
Conclusion
The “DIY Outdoor Wood Furnace Guide” empowers individuals with comprehensive instructions and expert tips to create cost-effective, eco-friendly outdoor wood furnaces. It highlights the benefits of using wood as a renewable fuel source, emphasizes safety considerations, and outlines the skills required for installation. Whether opting for a DIY approach or a ready-made furnace, this guide helps readers make informed decisions to reduce heating costs and environmental impact.
